Audiences are a point-in-time group of customers based on dynamically updating customer attributes, event-based data, data science models, action affinity, and/or email lists criteria groups. These groups can be used alone or in tandem with others to focus on your target customers.
Audiences can be created on their own to gauge size and reach potential, or can be associated with a campaign.
View an Audience
You can see all of your audiences in one place by navigating to  Audiences > All Audiences.

- Visual indicator for which type of audience. The blue envelope indicates email audiences and purple phone indicates mobile.
- The audience name. You can click the name to view or edit the audience.
- The estimated size of the audience from the last time someone previewed and saved the audience.
- Displays a hyperlink to any campaigns where the audience is being used.
- The date the audience was last edited and saved.
- If View Insights is enabled, you can click and view audience insights.
- If you click the ellipses, you can choose the following actions:
- Activate Insights, if it's inactive on the audience.
- Deactivate Insights, if it's active on the audience.
- Duplicate audience, to make a copy of the audience.
- Copy to account, to make a copy of the audience in another namespace.
- Delete audience, to permanently remove the audience.
For optimal website performance, activate up to 10 audience insights at a time. If you need additional audience insights, deactivate them on another audience and activate them on the new one.
Create an audience
You can create a near-limitless amount of unique audiences with the criteria groups available, but there are two types of audiences most commonly created:
-
Abandoned series
-
Includes abandoned cart, abandoned search, and abandoned product
-
Used with Trigger Campaigns
-
-
Category affinity for different brands or products
-
Audiences can include a division, such as men's or women's clothing
-
Used with both Promotional/Batch Campaigns and Trigger Campaigns
To create an audience, complete the following:
- Navigate to > All Audiences. The list of audiences appears
- Click Create New Audience. The Audience Identifier dialog box appears.
- Click either email or phone and click Next. The Create New Audience page appears.
Optional: Add an audience template
Audience templates are optional pre-defined audiences that, when selected, add category groups.
To add a template in your audience, click Audience Templates and click the template you want to add.
Adding a template will override any criteria groups that are on your audience.

You can choose from the following templates:
- Search Abandonment
- Customers who abandoned their search within a timeframe and have not browsed for products, added a product to their cart, or made a purchase since that time.
- Cart Abandonment
- Customers who abandoned one or more products in their cart within a timeframe and have not made a purchase since that time.
- Product Abandonment
- Customers who browsed for products within a timeframe and did not add the products to their cart or make a purchase since that time.
- Wishlist
- Customers who added a product to their wishlist within a timeframe and have not made a purchase since that time.
- Post Purchase
- Customers who made a purchase within a set timeframe
- Price Decrease
- Customers who have interacted with a product that had a price decrease within a timeframe and did not purchase the product within the timeframe.
- New Arrivals
- Customers who have interacted with products that are similar to newly added products within a timeframe, and the customer also has not made a purchase within a timeframe.
- Back in Stock
- Customers who have interacted with a product within a timeframe and didn't purchase that product, and the product is back in stock.
Add a criteria group
Criteria groups filter your audience down to the exact group of Customer Profiles that you want, and live in sections within the audience.

Criteria groups can be dragged within the section by clicking on the drag icon.
Criteria groups can’t be dragged to other sections.
For more information on the audience logic and criteria groups, see Create audience criteria groups.
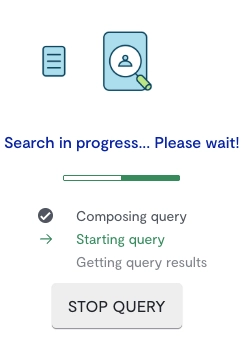
Preview audience
When you are finished adding criteria groups, click Preview Audience.
A query runs based on your criteria and, when complete, displays the number of Customer Profiles in the audience.
Duplicate an audience
-
Click the three dot menu on the audience you want to duplicate and click Duplicate Audience. The Duplicate Audience dialog box appears.
- Enter a new audience name.
-
When finished, click Duplicate Audience. The audience page is refreshed and the audience is duplicated.
Copy an audience to multiple Namespaces
If your brand has multiple Namespaces, you can copy an audience.- Click the ellipses on the audience you want to duplicate and click Copy to Account. The Copy Audience dialog box appears.
- Click the Namespace you want to copy the audience to and click Copy. The audience page is refreshed and the audience is copied to the selected Namespaces.
Effective marketing campaigns rely on precise audience targeting.
This article explains how to leverage the section logic (using AND and OR operators) to reach the right customers, and an overview of each of the criteria groups available.
Section logic
One audience section can contain up to one of each criteria group, and each audience can contain up to 10 sections.
In each section, criteria groups are linked by an AND operator, meaning all criteria in that section must be met.
Sections are linked by an inclusive OR operator, which means a customer can belong to section A, section B, or both A and B.
To learn more about how to create an audience using criteria groups, see Create an audience.
Example
You are creating a campaign targeting opted in customers who:
- Recently added a product to their cart.
- Have a birthday this month.
The target audience differs depending on the logic used.
Using AND logic
In section A, you click Add Criteria Group and add a customer behavior criteria to include customers who added products to their cart in the last seven days.
You then click Add Criteria in section A and add a customer attribute to include customers whose birthday is this month.
This audience targets customers who added a product to their cart and who have a birthday this month.

Using OR logic
In section A, you click Added Criteria Group and add a customer behavior criteria to include customers who added products to their cart in the last seven days.
You then click OR and add a customer attribute criteria to add a customer attribute to include customers whose birthday is this month. This creates section B.
This audience targets customers who did the following in the last seven days:
- Added a product to their cart OR
- Have a birthday this month OR
- Added a product to their cart and had a birthday this month.

Channel & eligibility
Email and SMS/MMS eligibility are customer-level attributes that ensure customers are getting the campaigns that they are permitted to receive.
When creating an audience, channel eligibility always includes both email and SMS/MMS eligibility statuses.
If you do not include any eligibility statuses in the audience, the audience defaults to include all statuses. For more information on how to include all statuses, see Add all eligibility statuses.
For more information on eligibility, see Understanding email eligibility and Understanding SMS/MMS eligibility.
The email channel supports the following modifiers:
- Most recent email unsubscribe
- Target customers who have unsubscribed from email campaigns within a certain time period.
- For example, engage customers who unsubscribed from emails in the last 30 days with an SMS/MMS campaign.
- Most recent email opt-in
- Target customers who have opted in to receive email campaigns within a certain time period.
- For example, send a welcome email to customers who opted in within the past 24 hours.
The SMS/MMS channel supports the following modifiers:
- Most recent SMS unsubscribe
- Target customers who have unsubscribed from SMS/MMS campaigns within a certain time period.
- For example, engage customers who unsubscribed from SMS/MMS in the last 30 days with an email campaign.
- Most recent SMS subscribe
- Target customers who have subscribed to SMS/MMS campaigns within a certain time period.
- For example, send an anniversary campaign to those who have been subscribed for a year.
For eligibility updates received via an integration (such as the Bluecore Website Integration or Unsubscribe Pixel), the audience uses the date provided by the integration.
For eligibility updates received via a managed feed or import, the audience uses the eligibility event date, if provided. If no date is provided, the audience uses the date the file was imported.
SMS/MMS eligibility for email audiences
Email campaigns can target customers based on their SMS/MMS eligibility. Customers may have multiple phone numbers associated with their Customer Profile, each with their own eligibility status.
The customer’s overall SMS/MMS eligibility is determined by the eligibility of all phone numbers.
The following table represents how eligibility is treated if more than one phone number is associated with the Customer Profile.
| Phone one eligibility | Phone two eligibility | Overall SMS/MMS eligibility | Explanation |
|---|---|---|---|
| Opted in | Known | Opted in | If any associated phone number is opted in, the customer is considered opted in. |
| Opted in | Unsubscribe | Opted in | If any associated phone number is opted in, the customer is considered opted in. |
| Known | Unsubscribe | Known | If no phone number is opted in and at least one is known, the customer is considered known. |
| Unsubscribed | Unsubscribed | Unsubscribed | If all phone numbers are unsubscribed, the customer is considered unsubscribed. |
Email eligibility for SMS/MMS audiences
SMS/MMS campaigns can target customers based on their email eligibility. Customers can only have one email address associated with their Customer Profile.
Customer Attributes
Customer attributes are details about a customer's profile that are collected using a site campaign, Bluecore integration, or data import.
You can collect as many attributes as you need, such as loyalty status, as well as the standard customer profile fields:
- Email
- Customer's email
- First name
- Customer's first name
- Last name
- Customer's last name
- Birthday
- Customer's birthday
Customer date attributes can reference specific or relative dates so you can send more precise campaigns based around birthdays, loyalty membership date, or other dates captured on the Customer Profile.
For example, you could send out a birthday campaign the month before a customer’s birthday, a birthday email on their actual birthday, and a follow-up one month after.
Additional date filters include but are not limited to:
- Before or after a specific date, such as customers who signed up for a loyalty account before 1/1/2025.
- Before or after a relative date, such as two days ago or two weeks from now.
- Between a relative timeframe, such as between three to four weeks from now, such as loyalty points that expire in three to four weeks.
- A date that recurs on the day of the current, next, or previous month, regardless of the year.
Customer behaviors
Audiences can be segmented based on customer behaviors, like their engagement with email and/or mobile or website product interactions.
There are standard behaviors that you can use, and custom behaviors can be created as needed.
The following behaviors can be used in both email and phone number audiences:
| Behavior | Definition | Behavior Type |
|---|---|---|
| Click email | A customer opened an email and clicked a link within it. | Message |
| Click SMS | A customer read an SMS/MMS and clicked the link within it. | Message |
| Received email | A customer receives an email from your company. | Message |
| Received SMS | A customer received SMS/MMS. | Message |
| Open email | A customer opened an email. | Message |
| Send email | Your company sent an email to a customer. | Message |
| Send SMS | Your company sent an SMS/MMS to a customer. | Message |
| Search for product(s) | A customer clicked a category or types in a search term but didn’t view a product page. | Site |
| Browse category | A customer viewed a product but didn’t add to cart or purchase. | Site |
| Add product(s) to cart | A customer added one or more products to their cart. | Site |
| Add product(s) to wishlist | A customer added one or more products to their wishlist. Note: This must be configured first before it’s available for use. Contact your Customer Support Manager to get this set up. | Site |
| Purchase products | A customer completed a purchase. | Site |
| Remove from cart | A customer removed one or more products from their cart. | Site |
| View cart | A customer viewed their cart. | Site |
| View product(s) | A customer viewed a product. | Site |
| First identified date | A customer was first identified on your site. | Site |
| Engaged onsite | A customer engaged with a Site campaign. | Site |
| Notify me back in stock (BIS) | A customer chose to be notified when a product was back in stock. | Site |
| Notify me coming soon (CS) | A customer chose to be notified when a product launches and is available for purchase. | Site |
Product filters
Additional product attributes can be added as filters to narrow down which products a customer interacted with, for example by category or by color.
There are standard product fields that are on all products that can be leveraged for further filtering:
- Id
- The product's SKU
- Name
- The product's name
- Price
- The product's price
- Created
- The created date. In an audience, this is leveraged by selecting a timeframe the product was created after, in hours, days, weeks, months, or years
- On sale
- Indicator if the product is on sale
- If true, the product is on sale. If false, the product is not on sale
- Out of stock
- Indicator if the product is out of stock
- If true, the product is out of stock. If false, the product is in stock
- Url
- The URL to the product where it can be purchased
- Image
- The URL of the image
Some product filters, such as price or out of stock status, can be refined to use a time frame so it refines the audience by the value is at the time of the customer behavior event or at the time of the campaign send.
If you need to capture more product attributes, you can create custom ones.
Channel Preference
The channel preferences section uses a predictive, machine learning model to filter any audience by customers who prefer email, SMS/MMS, have no preference, or whose preferences are unknown.
Channel preferences are displayed on a linear bar, with the highest email preference at the beginning, no preference in the middle, and high SMS/MMS preference last.

To include customers who have only one channel captured, select the option under Customers without a preference. The selection defaults to the type of audience you have created.
For example, an email audience defaults to email and an SMS/MMS audience defaults to SMS/MMS.
Static Email List
The static email list allows you to select a previously uploaded email list.
Predicted Customer Lifetime Value
The predicted customer lifetime value (PCLV) targets customers based on the predicted total amount they may spend in the next two weeks. You can filter your audience by the top percentage, percentage range, or the bottom percentage.
Lifecycle Stage
The lifecycle stage filters customers down to their predicted lifecycle stage that’s based on their past activity. You can choose from the following lifecycle stages:
- Non-buyers
- Customers who have not yet made a purchase
- Active buyers
- Customers who have made a purchase within their typical buying cycle
- At-risk buyers
- Customers who are nearing the end of their typical buying cycle and who have not yet made a purchase
- Lost buyers
- Customers who did not make a purchase within their buying cycle and may never purchase again
Likelihood to Take Actions
Customers can be targeted by how likely they are to take the following actions in the next two weeks.
- Likelihood to convert
- How likely a customer is to make a purchase
- Likelihood to unsubscribe
- How likely a customer is to unsubscribe to email notifications
- Likelihood to open
- How likely a customer is to open an email
- Likelihood to click
- How likely a customer is to click a link within an email
Product Preferences
Using product preferences constructs an audience based on predictions about the products that customers are interested in.
- Highest category preference
- Target customers by their highest category preference within a defined list of categories
- Highest category preference groups must be created first
- Category preference
- Target customers who have a preference to a specific product attribute, like color or size
- Discount preference
- Filters customers by their preference to purchase with or without a discount
- Replenishment preference
- Finds customers who purchased a product that is eligible for replenishment with a specific timeframe
Custom Email Lists and Custom SMS Lists
Custom Email Lists are used for email audiences, and Custom SMS Lists are used for mobile audiences. Both types of lists are managed via import jobs.
Use this criteria group in your audience to target email or phone number lists.